A premium spot UV finish can sometimes peel off a finished product. A metallic logo might also print with blurry, undefined edges. These costly errors often happen when the technical details of silk screen printing are overlooked.
The process itself is a powerful tool for adding value, but its success depends on mastering the details.
This ultimate guide is designed to provide that mastery.It will break down how screen printing works, the different methods available, its key applications, and its core advantages and disadvantages.
What is Screen Printing?
Silk screen printing is a classic printing method where ink is pushed through a stenciled mesh screen to transfer a design onto a surface.
This process creates a thick, durable, and vibrant layer of ink, making it the ideal choice for high-impact graphics on apparel, posters, and creating special finishes like spot UV on packaging.
The global screen printing services market is expected to reach USD 8.16 billion in 2025 and grow at a CAGR of 4.63% to reach USD 10.24 billion by 2030.
What is the Process of Screen Printing: Step-by-Step Guide

Phase 1: Pre-Press (Design & Screen Preparation)
This is the foundational stage where the design is translated into a physical printing tool. Getting this right is 80% of the battle.
Step 1: Finalize the Artwork & Color Separation
This is the foundational stage. It turns a digital file into a physical printing tool.
First, the design is separated into different layers. Each layer represents one color. Each color layer is then printed onto a clear film. This creates a film positive. The design on the film is opaque black.
Next, a mesh screen is coated with a light-sensitive emulsion. It dries in a dark room. The film positive is placed on the screen. The screen is exposed to strong UV light.
The light hardens the emulsion. The black ink on the film blocks the light. The emulsion under the ink stays soft. The screen is then washed with water.
The soft emulsion washes away. This leaves a clean stencil of the design in the mesh. The screen is now ready for printing.
Phase 2: What is The Screen Printing Process (Execution)
This is the hands-on phase where ink is transferred to the packaging material.
Step 2: Set Up the Press & Register the Screens
The flat, unfolded packaging material (e.g., a die-cut box blank) is placed on a flat printing bed. The first screen is locked into place on the printing press above the packaging.
This is a critical step: the screen must be precisely aligned so the design prints in the exact correct location.
This alignment is called “registration.” For multi-color jobs, tiny crosshair marks (registration marks) are used to ensure each subsequent color screen aligns perfectly with the previous one.
Step 3: Apply the Ink
A generous amount of the first color ink is poured onto the top of the screen. A rubber blade called a “squeegee” is used to pull the ink across the length of the screen.
With firm, even pressure, the squeegee pushes the ink through the open areas of the stencil and onto the packaging material below. This single pass is called the “print stroke.”
Step 4: Print Subsequent Colors
If the design has more than one color, the printed packaging is typically “flash-cured” (partially dried with a quick burst of heat) to set the ink.
Then, the press is set up with the next screen (for the next color), which is carefully registered. The process of applying ink with the squeegee is repeated. This cycle continues until all colors have been printed.
Phase 3: Post-Press (Curing & Finishing)
This final phase ensures the print is permanent, durable, and ready for assembly.
Step 5: Cure the Final Print
Once all colors are printed, the packaging sheet is sent through a large conveyor dryer.
- For standard inks (plastisol, water-based): A tunnel dryer uses heat to fully “cure” the ink, chemically bonding it to the packaging material.
- For Spot UV finishes: The clear UV varnish is screen printed last, and the packaging passes under a powerful UV lamp. The UV light instantly cures the varnish into a hard, glossy, and durable layer.
Applications of Screen Printing: Versatility Across Industries
In practical packaging, screen printing is not a ‘niche printing method.’ It is a ‘packaging texture amplifier.’ It is made for special materials, special effects, and special production runs. Its core value is to ‘push beyond the boundaries of traditional printing.’
It delivers strong adhesion and high saturation. It creates tactile, dimensional effects. It works on non-flat surfaces, unconventional shapes, and special substrates.
Other printing methods like offset, flexo, and digital have limitations. Screen printing solves the packaging challenges these other methods cannot handle.
Master Material Compatibility: Screen Printing is the Universal Solution for Packaging Substrates

In the packaging industry, the most difficult challenge is printing on non-flat or special materials. Offset printing struggles with uneven surfaces, digital printing often has poor adhesion, and flexography is not cost-effective for small batches.
Screen printing is the hero in these scenarios. However, success depends on precisely matching three elements: the Substrate, the Ink, and the Pre-treatment Process.
Paper-Based Packaging with silk printing: Don’t Let Texture or Thickness Ruin the Effect
The key advantage of screen printing on paper is its strong coverage, which can completely hide the color of a dark paper stock. In practice, you must pay close attention to the paper’s flatness and ink absorption.
- Corrugated or Textured Paper: These surfaces are uneven. Ink can easily pool in the crevices, blurring the design.
- The Solution: We use a screen with a wider mesh (40-80 mesh) to apply a generous layer of ink that covers the texture. The ink itself is formulated to be thick at rest but flow smoothly during printing, filling the gaps without bleeding.
- Laminated or Coated Paper: These smooth, non-absorbent surfaces require special handling.
- The Solution: The surface must first undergo “corona treatment” to ensure the ink adheres properly. We use UV-curing inks that dry instantly under UV light, preventing smudging. Crucial Tip: Printed sheets cannot be stacked immediately. They need 24 hours to fully cure, otherwise the ink can transfer to the back of the sheet above it (“back-tacking”).
- Thin Paper or Tissue Paper: These delicate materials can easily wrinkle or deform.
- The Solution: We use a vacuum table to hold the paper perfectly flat during printing. A lightweight, water-based ink is chosen to avoid weighing down and distorting the paper, applied with a finer screen (120-150 mesh) to prevent the ink from soaking through.
Plastic, Metal, Glass & Fabric with silk printing: The Essential Choice for Non-Paper Packaging
These materials are vital components of packaging (e.g., PET bottles, metal tins, glass jars, canvas bags). Other printing methods fail here due to poor adhesion or limited effects. Screen printing’s combination of strong adhesion and specialty inks makes it the go-to choice.
Ready To get Custom Packaging ?
Contact us with a Lower Quantity
Plastic Packaging
Plastic packaging, like PET, PP, and PE bottles, has a very slick surface. Because of this, ink can peel right off without any preparation.
To solve this, the plastic surface must get a “corona treatment.” This process raises the plastic’s energy to at least 38 dyn/cm. A higher energy surface helps the ink stick permanently.
For food containers, there are special rules. These items need inks that meet FDA safety standards. After printing, the ink must cure completely.
It can air dry for 72 hours, or it can be cured instantly with UV light. This important step makes sure no chemicals from the ink can get into the food.
Metal Packaging
Before printing on metal packaging like tin cans or aluminum bags, the surface must be very clean. All oils have to be removed. The process then uses special enamel inks.
These inks are baked at a high temperature, between 200 and 220°C, for about 10 to 15 minutes. This heat locks the ink onto the metal. The result is a very strong, scratch-proof design, which is perfect for gift tins and cans.
Glass Packaging
Printing on glass bottles and jars needs special inks to last a long time. For the most durable finish, the ink is fired onto the glass in a hot oven called a kiln. The temperature can reach 500 to 600°C.
However, some glass, like many cosmetic bottles, cannot handle that much heat. For these items, modern UV inks are used instead. These inks dry instantly under a UV light and create a strong, lasting bond.
Fabric Packaging
Screen printing is an excellent choice for fabric items like canvas bags and velvet gift boxes. It provides a high-quality feel at a low cost. The process uses water-based inks. These inks stay soft and flexible on the fabric after they dry and do not feel stiff.
The ink is applied with an 80-100 mesh screen to make sure it fully covers the fabric’s texture. Then, the item is dried gently at a low temperature of 60-80°C. This prevents the fabric from shrinking.
A screen-printed logo on a canvas tote bag is much more colorful and lasts longer than a heat transfer. It is also very washable.
Advantages and Disadvantages of Screen Printing
What is Screen Printing Advantages

1. Unmatched Tactile and 3D Effects
Screen printing excels at applying thick layers of ink. It creates textures impossible for standard offset or digital printing. This is accomplished through high-build inks. Examples include UV varnishes and embossed inks.
Significant Ink Thickness: A screen-printed ink layer can be 50-200μm thick, compared to a mere 5-10μm for a typical offset UV layer. This creates a distinct, raised effect.
Applications:
Embossed Textures: Imagine a luxury chocolate box with a raised wood grain texture. Customers can physically feel it. This instantly signals a premium product.
Functional Grips: Anti-slip patterns can be printed on the bottom of beverage cans. The ink is mixed with rubber particles. This prevents the cans from sliding when stacked.
2. Superior Versatility with Specialty Inks
Screen printing is compatible with a vast range of specialty inks. These inks produce stunning visual effects. They also add interactive elements to packaging.
Special Visual Effects: It supports inks unavailable in other processes. These include fluorescent, glow-in-the-dark, thermochromic (color-changing), metallic, frosted, and matte finishes.
Applications:
Engaging Children’s Products: A glow-in-the-dark logo on snack packaging can capture a child’s attention and create a memorable experience.
Cost-Effective Luxury: A frosted metallic label on a high-end liquor bottle achieves a sophisticated “brushed metal” look. It does so at a potentially lower cost. The savings can be up to 30% compared to traditional hot foiling.
3. Application of Functional Inks for Smart Packaging
Screen printing moves beyond aesthetics. It can integrate functionality directly onto the package. This process bridges the gap between physical products and digital experiences.
Functional Ink Types: This includes printing with conductive inks for RFID antennas. It also includes durable anti-scratch varnishes and peelable inks for promotions.
Applications:
Freshness Indicators: Thermochromic inks on fresh food packaging can change color. This change visually indicates if the product was kept at the correct temperature.

Protective Surfaces: A clear anti-scratch coating can be printed on electronics packaging, like for a power bank. The coating protects the box from scuffs and abrasions during shipping. It ensures the package looks pristine at the point of sale.
What is Screen Printing Disadvantages

While powerful, screen printing is not the ideal solution for every project. Its primary drawbacks are related to speed, complexity, and cost in certain scenarios.
1. Slower Production Speeds
The process is inherently mechanical and slow. It is slower than high-speed methods like offset or flexography. Each color requires a separate pass. Time is needed for curing or drying between layers. This makes the process less suitable for jobs with extremely tight deadlines and very high volumes.
2. Limited Resolution for Fine Details
The use of a mesh screen creates a physical limit. This limit affects the fineness of reproducible detail. Screen printing is not the best choice for photorealistic images.
It also struggles with designs having very subtle gradients and tiny text. Offset lithography would produce a crisper result in these cases.
3. Higher Cost for Full-Color, High-Volume Jobs
It can be cost-effective for specialty finishes. However, it becomes less economical for standard CMYK (full-color) printing at high volumes. The initial setup is complex.
A separate screen must be created and aligned for each color. Consider a simple brochure run of 100,000 units. Offset printing would be significantly faster and cheaper.
4. Higher Ink Consumption
The thick ink deposit creates its signature tactile effects. It also means the process consumes significantly more ink per print than other methods. Using expensive specialty or functional inks can be a factor. This can substantially increase the unit cost.
Quick Guide: When to Use Screen Printing
| Dimension | Suitable Scenarios (Strengths) | Scenarios to Avoid (Weaknesses) |
|---|---|---|
| Substrate |
|
|
| Effect & Finish |
|
|
| Batch Size |
|
|
| Cost Logic |
|
|
Conclusion: Making the Right Strategic Choice
In essence, the strategic decision to use screen printing in your packaging boils down to a simple rule of thumb.
Your goal is to create a premium feel. You want to use special materials or unique tactile and visual effects. Your production run is not massive.
In these cases, screen printing is your optimal solution. It is the key to unlocking the “texture premium.” This premium makes a product feel truly special.
Conversely, consider a different priority. The priority is high-volume production with photorealistic detail and precision. You should then consider a hybrid approach, like combining screen printing with offset. Or you should choose another method entirely.
Understanding this logic is the first step. The next step is applying it to your unique project. Here, material compatibility, ink formulation, and cost-effectiveness intersect. At this point, expert guidance becomes invaluable.
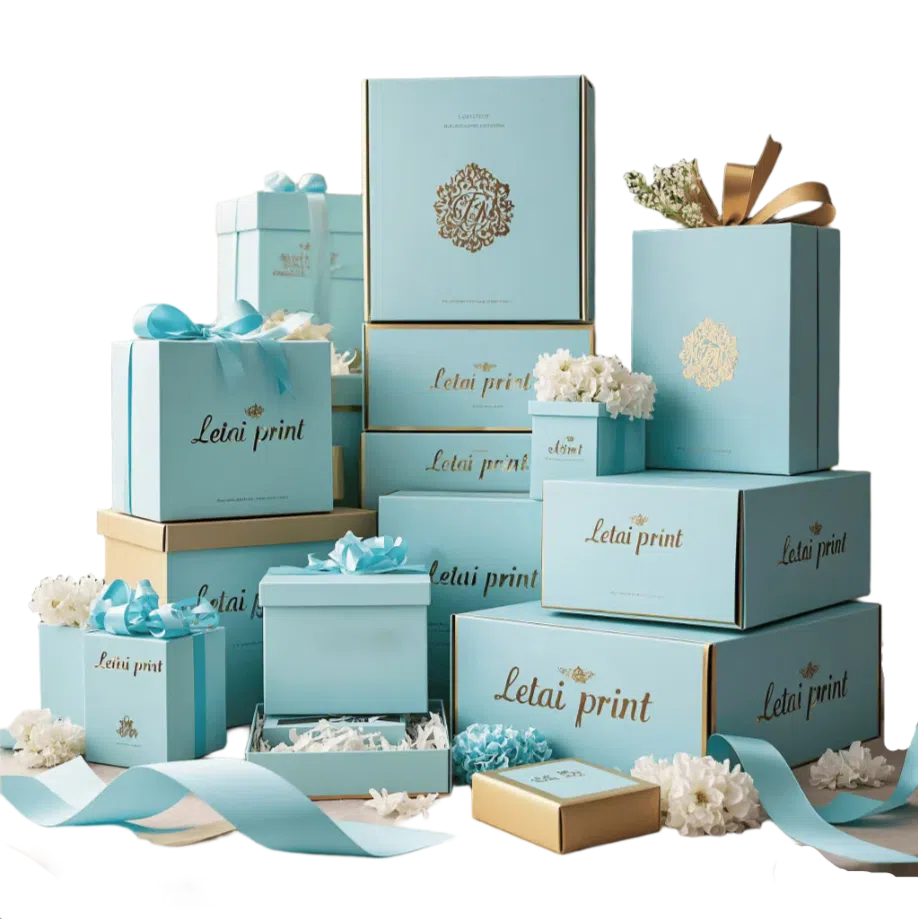
Ready to Elevate Your Packaging?
Ready to transform your packaging from standard to standout? The team at Letai Printing specializes in leveraging the power of screen printing to create unforgettable brand experiences.
Whether you need a tactile varnish that customers can’t help but touch, a brilliant metallic finish that catches the eye, or a functional coating that adds value, we can help you navigate the technical details and find the perfect solution for your budget.
Contact Letai Printing today to discuss your project and discover how we can bring your vision to life.
I have honed my expertise in creating high-quality packaging solutions, bringing both innovation and efficiency to the field. I am passionate about delivering exceptional results and contributing to sustainable packaging practices.
- What is a CBD Box? The Ultimate Guide - June 9, 2026
- Bangle Box Ideas: Inspiring Designs for a Clutter-Free Space - June 8, 2026
- What is a Bangle Box? The Ultimate Guide - June 8, 2026